Bulge Filter
Intro
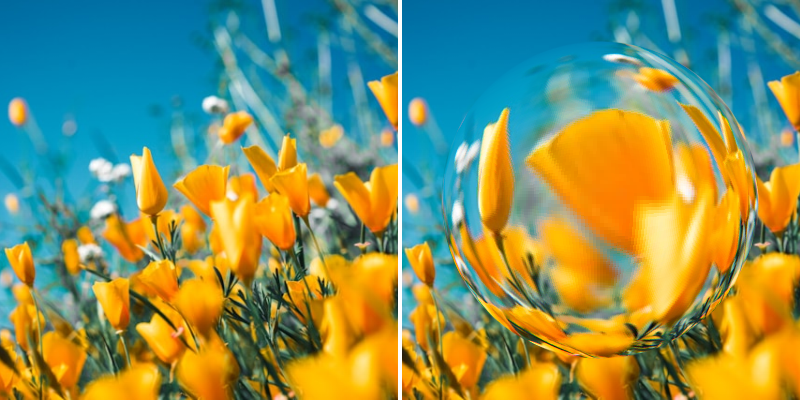
Distort a Shape by wrapping it onto a spherical surface, creating a bulge or pinch effect.
UI
Sampling Quality - Controls how the image is sampled/interpolated. The options can be thought of as low to high quality from top to bottom and can be useful when working with fine details like text.
- Nearest Neighbour – Uses the closest pixel without blending.
- Bilinear – Blends between nearby pixels for smoother results. Good for general image scaling but can introduce a softness/blur.
- Catmull–Rom – A high-quality resampling method that produces sharper results and preserves fine detail.
- Mitchell – Balanced high-quality filtering.
Passthrough Background - When checked, the background outside the bulge's sphere will be rendered when Blend Mode is set to Replace.
Amount - Determine the strength of the spherical distortion where positive values create a bulge effect and negative values create a pinch effect.
Centre - Set the centre point of the spherical effect in pixels where 0,0 is the centre of the image.
Radius - Set the radius of the spherical effect as a percentage of the Shape's size.
Refraction - When unchecked, the effect becomes a simple height-map distortion without optical effects.
Refractive Index - Set the material's refractive index to control how much light bends. Common values include 1.33 (water), 1.5 (glass) and 2.5 (diamond).
Chromatic Aberration - When Refraction is checked, set the amount of color separation in pixels at the sphere's edges to simulate light dispersion through glass.